Wednesday, October 4, 2017

Fall Painting Class this Saturday

This is a class for painters of all levels. Beginners are welcome.
Fall Landscape class starting next weekend- Saturdays 10-1, Oct 8th thru Nov 5. Fee $180.

We will spend the entire class in one location (Still to be determined- considering a park on the river) allowing folks the time to work on a piece for multiple sessions.

A Kiss from Johnny, by Robert Harris (1952)
I have a very hands on approach to my teaching and give very thorough critiques (rarely as intimate as the above painting indicates). Come enjoy the cooler weather and the fall colors.  With "Cincinnati's most charming painting teacher", we will meet at a scenic parks to learn to sketch and to paint with oils. Drawing on the ideas of impressionism, you will practice the techniques needed to complete painted sketches, including basic composition, value, pattern, color spotting, and covering the canvas. Then, building on those skills, you will complete a larger fully realized landscape painting that will capture the impression of light and color of the Cincinnati landscape. Details and directions to the various locations will be given in class. No experience necessary
One thing I will be stressing is that what we are doing is landscape painting- and not Plein Air. We are Americans! Students are not allowed to call it 'plein air' unless they are actually French.

 Email me if you have questions at richard_luschek@yahoo.com
Or call 513-479-3322 

Friday, May 12, 2017

The Frame is the Father!

While I do have work in a big show opening tomorrow at the Eisele Gallery, I thought I would chat a bit more about the frame I made for the Star Wars show, hanging until the end of the month at the Brew House. If you and your children are Star Wars fans and you don't show up and buy them some art- someone really should call Child Protective Services on you.
Philosophical Sci-Fi Drive-By, Oil on linen, 20"x10", © copyright Richard Luschek 2017


It all started when I bought an old toy case in an auction. Also in that pile of toys was the AT-AT I used in the still life set up for the painting, the R2 cassette player in my other painting, and a C3PO case. I already had a Darth Vader case from my childhood and this one was in bad shape, so I did not feel as bad appropriating it.
First I had to cut the case apart and trim off all the extra plastic. I had to cut into the bottom to make room for a panel and then made a paper template that I would be able to screw to plastic Vader head.


I traced this and added lower frame section on a sheet of 1/2 plywood that I found set out by the street for the garbage. I just wanted a rough shape that I could add the actual frame to.

There were holes in the case for pushing in plastic bands to hold in and lable your Star Wars action figures. I was able to screw into those and secure the panel to the head. Next I cut a square in the panel so I could start adding hardwood to the front.

Again, the hard wood is from a painted shelf I had in my scrap pile.
Now I just had to sand it all and start adding my decorations to it.


The frame looked a bit blocky, so I added some edging, and a finally to really take it over the top I cut a piece for Darth Vader's cod piece. Which, after studying Vader's costume, I realized has a door on it. I guess even Vader needs to use the rest room. Now Im thinking every frame should have a cod piece.
After looking up reference for Vader's belt, I cut the designs out of cardboard and wood. They were glued on and the entire frame was sanded smooth. It was ready for painting. I bought gloss black plastic spray paint. Luckily it was a nice day so I was able to spray outside. I wore a respirator as that paint is pretty noxious.

I had a slight issue when during the second coat, the paint on certain sections started to wrinkle. I had waited what I thought was the correct time between coats (48 hours), but it was a chilly week and had apparently not cured enough. After a temper tantrum, which is very embarrassing in hindsight, I let it dry in my hot van for a few days, sanded it all smooth and gave it a nice clean final coat.


I love that it has a medieval icon look. I have more old toys in my basement, so another Star Wars frame may be in my future.

Wednesday, May 3, 2017

Frames with Rocket Power

Tomorrow is a big holiday. May the 4th is Star Wars Day. The local Cincinnati illustrators group have organized a Star Wars themed art show for the second year in a row. This fan art tribute show opens Thursday, May 4 at the Brew House in Walnut Hills and will be on view until June 4th. A percentage of sales will go to the George Lucas charity Force for Change. This is a kid friendly event. About 40 artists are showing work. There will be cos-play folk and an R2D2 rolling around. A Star Wars Improv group starts performing at 5:30. The opening will be from 4-11, Ill be there around 6 if that is an extra reason to show up.


Last year I did not have time to participate. This year I definitely wanted to be involved so I decided to do two quick paintings- of course I ended up doing way more than I initially planned. I had just purchased a few toys in an auction I thought would be perfect. The R2D2 cassette player was very cool and once I paired it up with a Verbot from the early 80s, I figure these robots would need to find a common language. The flag background added the patriotic space look I wanted.
Still life set up and the painting freshly signed.

Much of the work involved me custom making two frames for the work. I have in the past made a custom  Star Wars frame. I really enjoyed that process and decided to go at it again.
2X4 roughed out shape
Here is that process.
I had some sketches of space ship shaped frames in my sketchbook that I wanted to build. I rough cut one out of 2x4 scraps I had in the shop.

I ran the frame through the saw with the blade on an angle to get the sleek design and used a router to get the inset in the back for the painting and a bevel bit to shape the inside of the opening.
Next I added 1/4" plywood wings and the rocket ports on the bottom, which were made out of wooded eggs I had found- Yes, I save everything. I cut them in half and sanded the top flat and screwed them to the bottom.

Sanded shape with wings and rocket jets
Next I used scrap pieces of matboard and the cardboard backs from old drawing pads to hand cut panels. I would measure the pieces and then hand cut them with an exacto blade to get the bevel. They were then glued on following guide lines.
Covered in cardboard panels and spare parts.
Using another 2x4 piece I cut another rocket port at the bottom to balance it out and added a metal soffit vent. Then I add bits and pieces I had in the shop to add variety. I bought a few parts in the Hardware store that I could add to my ship. At the top, the round piece is a plastic electrical plug insert. The bottom vents on the corners are plastic PVC electrical pipe nuts, that I added metal screen pieces to. I used a few toy parts and upholstery tacks and made sure to sand all the bumps and edges.
Next I sprayed the entire frame with gray auto primer.


Freshly primed.
A few times sanding and priming and it was almost done. I then used acrylic washes to tone some color on some of the panels. I added a warm tone, a blue and a green to add some variety. An acrylic silver leaf tarnish gel was brushed all over the frame and wiped off to give some shadow to the recesses. I then drybrushed the frame with a light gray to get the frame to pop. I brushed on some powered pigments to grunge it up and it was ready for the painting.

Death Star Mix-tape, 19"x11, oil on linen, © copyright Richard Luschek 2017  

 Here it is on my back porch ready for take off. Hope to see you at the show.  I'll write about my Vader frame next week. The painting and frame are available. Message me if you're interested.


Friday, March 31, 2017

Spring Landscape Painting Class- Taught by a Great Guy

I will be starting up my Spring Landscape Class very soon. If you have taken classes with me, you are gonna want to sign up again. If you have not taken this class, then you definitely should do so now.

Great Guy painting in Eden Park
The Class will be held on Saturdays from 10:00 AM - 1:00 PM. It will start April 22 - June 10th.
8 weeks for $180.00 (that is an amazing deal) -supplies are the student's responsibility.

The class is great for beginners or any working painter who would like to be introduced to the ideas of the Boston School method- which are the most awesome of ideas. I am very hands on and teach to each individual's level of experience.

We will meet at various  scenic parks around Cincinnati to learn to sketch and to paint with oils. Drawing on the ideas of impressionism, you will practice the techniques needed to complete painted sketches, including basic composition, value, pattern, color spotting, and covering the canvas. Then, building on those skills, you will complete a larger fully realized landscape painting that will capture the impression of light and color of the Cincinnati landscape. In case of rain, we will arrange in parks with overhead cover. Details and directions to the various locations will be given in class. A supply list will be sent when you sign up.

If you would like to learn how to not paint yourself in a corner like this guy, then you should talk to me. 

 Email me at richard_luschek@yahoo.com for more information and to grab a spot. Or call 513-479-3322.


Tuesday, January 31, 2017

There Is No Try

"Only Do", oil on linen, 11x14, © copyright Richard Luschek 2017
private collection
This year I'd love to post one blog post a week. So far not so good, as this is my first post this year, on the very last day of January. Get off my back.
I completed this painting a while a while ago. It now has a wonderful home in Brooklyn, NY. I had so much fun doing the painting and making the frame that I thought this would be a great topic to ramble on about.

This picture started out as a demo I painted for a group of kids in Ripley, Ohio. I did a talk and demonstration at the library before helping the kids set up and paint their own still lifes.
I have painted something very similar once before, as I am a Star Wars "kid" it is a recurring theme that I have no problem revisiting.
The idea was to have Yoda using the force to lift the toy plane- or at least appear to lift the plane.  You barely notice the coffee cup, right?

Demonstrations are fun- but challenging. I like to talk during demos and I've found I can either talk well, or paint well.  I tend to choose the former so I don't sound like an idiot. Honestly, I thought it turned out OK considering the circumstances.
In a demo you have limited time, limited concentration and in this case an audience of limited attention span. So I stopped when I could tell I was losing their interest- about 35 minutes. Often I will just wipe a demo canvas down and paint something else but I like this one and I decided to set it up in the studio and spend some time finishing it.

Once I got it back in the studio, I tried to set it up similarly to what I had in Ripley. The lighting was very different but it was a better looking composition.
Here are a few shots of the painting in process- each panel representing roughly a day of work. The first panel shows me making sure the drawing and the layout worked. I was painting over the demo painting so I worked a bit more bold then I normally do. Day two I spent time pushing it back, losing edges and getting breadth of treatment.

With the painting complete it was time to consider the frame. I wanted something unique and different. I love playing around and experimenting with frames. Lately I have been trying to spend more time painting and less time framing. That's what frame shops are for.
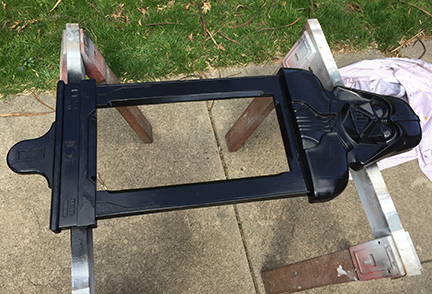
I had a cheap gold frame that was the right size. I thought this time I would go really crazy and make the frame look like a space station.
First thing I wanted to do was replace the corner flourish with Storm Trooper heads. I mean, this decision was obvious, right?
I made press molds in non-hardening clay and then cast the head by mixing up some Durhams Rock Hard Putty. Its wonderful stuff. I highly recommend it for frame repair, home repair, or any Martha Stewart crafty ideas you may have. Once it hardened they were popped out of the mold and sanded. I had to cast quite a few to get 4 good casts.

I had recently found a part off an old Star Wars toy in the bottom of a junk drawer. Back in the day (mid to late 70's), Star Wars toys came with assembly instructions, a list of parts, and an order form. If something broke you could send the form with proof of purchase into Kenner  and they would mail you a replacement part. The door on my Millennium Falcon broke (probably during an intense battle) so I had ordered a new one. This old broken toy part was perfect for the corners of my frame. I cut it on the band saw to so it fit and laid in on a bed of clay in a Tupperware container so I could make a mold. The piece I cut off was used on another part of the frame.
The first mold was a disaster. I used water based alginate casting material and it did not go well. I was mushy and crumbling as I used it. I tried again with a recipe I found online, using a tube of 100% silicone caulk thinned with mineral spirits, corn starch, a few drops of glycerine and acrylic paint. The next mold, while a bit stinky, was smooth and durable. Again using Durhams, I was able to cast 4 detailed corner pieces. I still have the mold, so this part may appear on more frames in the future.


Next on the list was to make the flat areas look like panels on a space vehicle. I tend to save all the cardboard from the backs of drawing pads. I comes in very handy. I cut panels to fill the areas between the corners, sketched out the designs and then cut them all with bevels. in a random pattern.
They were all numbered, laid out so I didnt get lost and later glued into place.


I used some left over model car parts (I recently have been building a model car for another still life I'm working on), strips of balsa wood, metal thumb tacks, and a piece of a plastic zip tie to decorate the frame.
I spray on automotive primer to seal it. I filled and sanded as needed.


A few coats and it was starting to look unified and smooth. For the final coat I went with a automotive flat gray. Space ship paint from NASA was just too costly.
After I got a few coat, I used brown and blue acrylic washes to tone the frame. I dry brushed raised areas with a light grey to highlight the edges and give it some dimension. Before a final clear coat I dusted it with various powdered pigments to get some age on the frame.

A close-up shot after the weathering and toning.

The frame took at least as long as the painting, but it was worth the effort.