Last post I discussed my
newest painting. I have been trying to do standard size paintings so I can easily get frames, but this time I strayed from that promise to myself and painted an arched painting for which a special frame was needed.
I thought I would post the process for making these special frames.You can follow along and make some yourself, though it would be best that you have some basic knowledge of woodworking and own a few tools. If you don't, I suggest you make friends with someone that does- Oh, and by the way. I don't mean me. I have enough friends and this blog post is as far as I am willing to go.
Basic idea here is to take a frame you already have, place a panel in the frame where the painting would normally go, then cut a new opening for a smaller picture. This can be done for any size or shape. This time we will be making an arched insert. I really enjoy the arched top paintings. It is a pleasant shape in which I enjoy composing.
If you have a lot of frames hanging around the studio this also opens up your options. Sometimes a frames is not quite the right size or shape. I have quite the
collection of old frames and am adding to that pile all the time. Small paintings often feel better with a big frame on. So you can take a 6 x 8 painting, using one of these panels to add an inch all around, and now the painting and panel will fit an 8 x 10 frame (did that make sense?)
After showing the steps to make the insert I will show you how to apply a painted finish. One "do it yourself" frame finish I am almost always happy with is the flat black, hand rubbed finish. I will explain how that is done at the end of this demonstration.
Below is a frame I purchased for $20 at
Castner Frames. It is for a 16 x 12 picture, the opening is 15 1/4 by 11 1/4. For my 13 x 9 painting with an arched top, this frame will work perfectly. I just need to make an insert. This is basically like making a fancy matte for a frame out of wood. While I am doing this for an arched top frame, it can be done for a square or oval picture.
Step one- Cut your insert:
I will start with a quote by Norm Abram, one of my heroes.
"Before we use any power tools, let's take a moment to talk about shop safety. Be sure to read, understand, and follow all the safety rules that come with your power tools. Knowing how to use your power tools properly will greatly reduce the risk of personal injury. And remember this: there is no more important safety rule than to wear these — safety glasses."
I have a 16 x 12" frame, so with the rabbit in the back I need and insert that will fit. Measure its exact size to be sure. For my insert I use a material called MDF (Medium Density Fiberboard). It is like a hard cardboard, made of paper fiber, wax and resin. It cuts like wood and takes paint well. You can buy handy 2' x4' sheets at most hardware stores. For these panels I normally like to use 1/2" thick, but all I had was 3/4". Either thickness will work.
I cut a piece to fit tightly in the frame rabbet- make sure it is square (you can check the diagonals, corner to corner, making sure those measurements are equal). I used a table saw, but a jig saw will work. I penciled out the size and shape of the new opening on the panel, making sure to center it. I drilled holes in the corners big enough to accept the jig saw blade.
Step Two- Cut out opening:
I use my trusty Jig Saw to follow the line as closely as I can.
Step 3- Smooth the cuts:
Using wood files and sand paper (100 grit) I sand the cut edges smooth. This step is important, so spend the time to get this right. You want smooth edged and nice curve. The saw is not exacting and will need to be cleaned up. I have an orbital sander that helped speed things up. Be careful to not sand at an angle or dig into the corners.
Step 4:- Route the edges:
You will of course need a router and a few bits. You need one bit for the edge that meets the painting. I used a simple cove bit- shown below on the right. A rabbet bit is used to cut the space in the back of the panel for the painting to fit into. The 45 degree chamfer bit eases the outside edge of the back of the panel were it fits into the frame. This is not necessary, but since I had a larger 3/4 thick board it just looked better. Read all safety precautions when doing this step. MDF resins contain small amounts of Formaldehyde, so wear a mask with cutting and sanding.
If you do not have a router, you could probably file an edge on the front as a transition, and just use z clamps to attach the painting to the back without a rabbet. This will take some time to get your hand filed edge even, but it could be done.
Step 5- Chisel the corners:
The router bits are of course round, resulting in rounded corners. You can leave them, but I think it looks cheap. I use a straight edge to mark off squared edges and use carving chisels to cut them square. I first cut straight into the corner, with a straight blade. Next I carefully make slight cuts on the squared lines I drew. Use the rounded chisel to ease out the material from that corner until it looks like a smooth transition. Sanding is usually required to clean things up. Go slow, as it is easier to take off more than to add some back.
Step 6- Suck it up and don't be a wuss.
Sorry for the graphic nature of the next image, but I want to demonstrate two things. One, that you need to be careful when using sharp chisels, always cutting away from your hand. Second, I wanted you to see what a total bad ass I am.
Did I stop here? No, I continued on like a man.
Yeah, Sorry about that Norm.
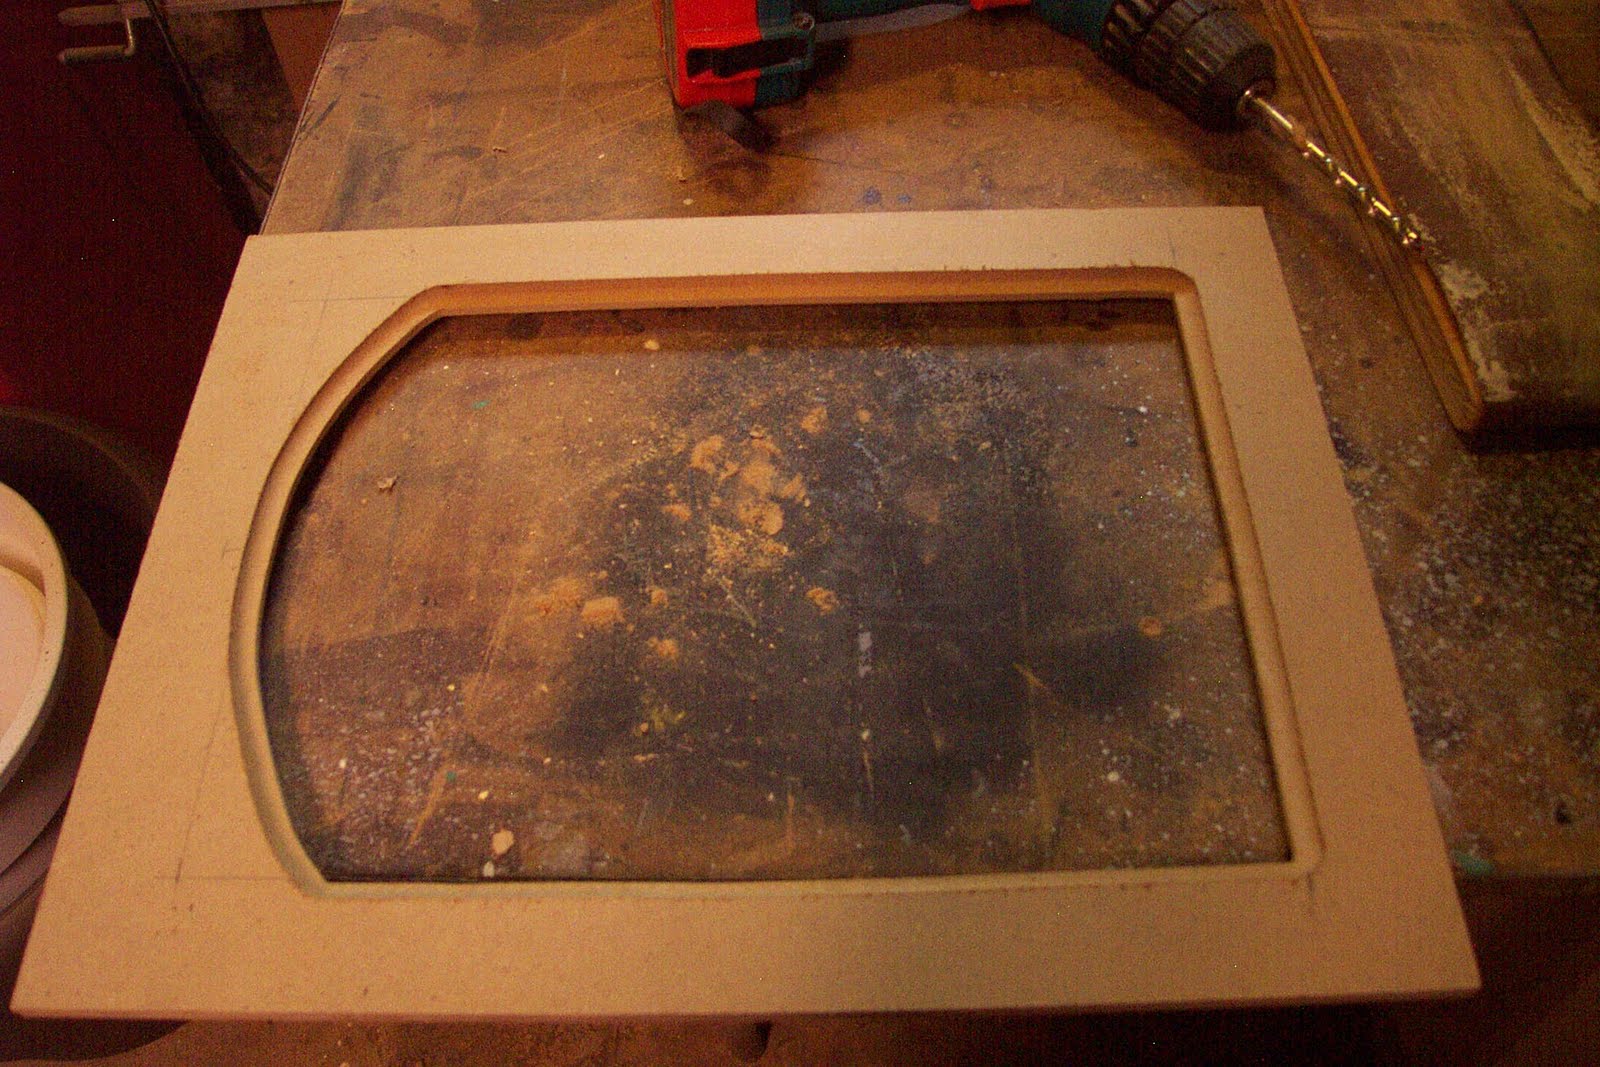
Step 7- Attach insert into frame:
You need to attach the MDF insert into the frame. I used pocket screws, being careful to not screw through the front of the frame. I have done this before. When this happens it is followed by about 15 minutes of profanity, and an extra 30 minutes of work repairing the frame. You can glue the insert in, use nails or just use z brackets as if you were putting a painting in the frame. I also fill the screw holes so it looks better. Not necessary unless you have
OCD like I do. Finally, go over the frame, sand any sharp edges front and back, fill any holes and generally make sure the frame is ready for paint. I clean off any dust with a rag or tack cloth.
Step 8- Prime and paint:
I used Red Iron Oxide primer in a spray can to coat the frame. I suggest you do this step outside if you can. You will find any remaining imperfections after you prime it. You can fill and sand those and then prime it again. I usually paint the front and back making sure to cover all the edges. The MDF will suck up a lot of paint. Painting them will make the fibers swell on the edges a bit. Sanding and priming a few times will get them very smooth. After the primer dries (usually I wait 24 hours) I coat it with a fast drying ultra flat black. One trick I do, is to force the paint to crack. I like this look as it adds age and variety. If you want some cracked or wrinkled looked to the finish, Look for a can with instructions suggesting you recoat it withing two hours or to wait 5 days. Paint will continue to cure even after it is dry to the touch. The paint is still uncured enough within two hours to accept a second coat. The paint will tighten and move as it cures for days. I disobey the directions and paint it after the suggested time. I wait about 4 hours and then spray it with a heavy coat, being careful to not get any runs. I paint heavier on the larger flat surfaces. This top coat which dries and shrinks faster than the under coat will start to crack in a few minutes. This is not an exact science, but it almost always works. I will say on this frame I got just a bit carried away. I prefer the cracking to be a bit more subtle.

Here is the frame after a final coat. You can click for a close up view to see how the paint cracked.
Step 9- Silver leafed edge and Final finishing :
I decided to add a silver leaf edge. There is a silver coffee pot in the painting so it will match. A leafed edge can help ease the transition from the frame to painting. I am not a leafing expert. This topic would require its own blog post. I suggest you look elsewhere for gold or silver leaf advice. If you want you can also paint the edge silver or gold. At times that looks almost as good.
I lightly sand the frame, especially the raised edges slightly to get through the black paint to the red primer. This gives it some age, distress and variety. The final step is to use
butchers wax. Most hardware stores should carry the wax. Using a clean rag, I scoop up some wax, giving it a nice even coat. I then use Rotten stone, a gray powder used for polishing. I use that to dust the corners and draw around the edges with a brush that has been dipped in the power. Blow off the excess. After the wax as set up a bit, I take a clean soft cloth and buff the frame. It will get a very deep shinny finish. I leave the rotten stone in the corners. It will stick to the wax and give it an aged look that I like. You can see that powder stuck in the cracked paint as well.
On the back I add the picture wire and the z clips for holding the painting.
Here it is all put together.
I really should stop making frames and just paint more pictures- but wasn't that fun?


